In the world of transportation and logistics, safety and efficiency are paramount. Kerley & Sears Inc., a trusted name in the industry, has partnered with RMC, one of our reliable vendors, to bring you the RMC Automatic Lids, a game-changer in ensuring safe and efficient operations. In this blog post, we will delve into the installation and maintenance of these cutting-edge lids to help you make the most of this innovative product.
RMC Automated Safety System Installation
Safety is our top priority. Before you start the installation process, remember to adhere to all safety requirements and wear the appropriate safety gear. Once you’ve taken the necessary safety precautions, you can proceed with the following steps:
1. Inspection of Components
Upon receiving the RMC Auto Lid, inspect all items to ensure nothing has been damaged during shipping, and all components are present. The following items should be included in your package:
The Auto Lid
Proper Install Kit
Control Box
Quantity of 2 swiveled air fitting elbows (in separate bag in the box containing the lid)
Airline (if ordered)
(Note: The Control Box and Install Kit may arrive in a separate box from the Auto Lid and the Airline roll.)
2. Manhole Ring Surface Preparation
The RMC Automated Safety System is designed to replace the original manual lid with minimal modification to the existing manhole ring. To ensure a proper seal and functionality:
The surface of the manhole ring should be flat and free from defects and material buildup.
If available, use the RMC Resurfacing Tool to resurface the manhole ring.
Maintain a minimum height of 1/8 inch from the surface of the Auto Lid bottom ring to the top of the manhole ring.
WARNING: Do not work on or around the trailer while under pressure. For engineering support, contact RMC Engineering at 800-549-2083 or visit rmcengineering.com.
Installing Your Auto Lid
Now that you’ve prepared the surface, let’s move on to the installation process:
1. Removal of Old Components
Remove the camlocks on the manhole ring along with the old manual lid.
Remove the manual hinge lugs and safety tabs on the manhole ring. Do not remove the camlock ears.
Eliminate any material buildup between the camlock ears.
2. Pin Blocks Installation
Place the six pin blocks (depending on the type of install kit ordered) between the camlock ears using clevis pins with the threaded hole in the pin block facing up. Secure with cotter pins. (Note: The Betts manhole ring has only one ear per camlock and requires two pin blocks per ear. Ensure you order the proper lid and install kit for your trailer.)
For Betts Install Only: Grind down the Betts camlock ears to match the shape of the pin block to avoid interference with the wire form.
3. Auto Lid Attachment
Carefully lift the Auto Lid onto the manhole ring, ensuring that you don’t damage any of the fittings on the underside of the Auto Lid.
Position the Auto Lid so that it opens away from the trailer ladder and is centered over the middle of the trailer.
Secure the Auto Lid to the pin blocks with the provided mounting screws. Ensure that the lid opens and closes freely without any interference. The gap between the Auto Lid gasket and the surface of the manhole ring should be even from side to side.
4. Control Box and Airline Installation
Attach the control box securely on the trailer frame in a convenient location.
Use the labeled airline tubing to attach the 5 airlines required between the control box and the Auto Lid, following the color codes provided.
5. Final Checks
Test the Auto Lid to make sure it opens and closes smoothly and that the airbag inflates for a proper seal.
By following these installation steps meticulously, you can ensure that your RMC Automatic Lid is properly installed, guaranteeing safety and efficiency in your operations. Furthermore, if you ever need maintenance for your lid, we offer comprehensive maintenance services to keep your system in optimal working condition. Remember to drain the trailer brake tank and follow the specified procedures for maintenance to ensure longevity and reliability.
Conclusion
The RMC Automatic Lid, in partnership with Kerley & Sears Inc., is a crucial investment for businesses that prioritize safety and efficiency in their operations. With proper installation and regular maintenance, you can enjoy the full benefits of this innovative safety system while ensuring the well-being of your team and cargo.
Got Questions? Let Us Help!
Kerley & Sears Inc. has been a family-owned and operated business since 1971. We specialize in the sales, service, and repair of pneumatic tools and industrial vacuum parts. With over 50 years in the industry, our customers can expect excellent customer service and can trust our expertise and quality work. We offer resale discounts and free estimates depending on the repair. Call us or stop by today!
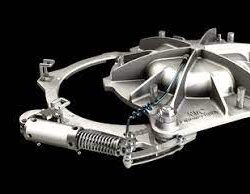
Power Take Off (PTO) is an essential component in many vehicles and machinery. It allows for the transfer of mechanical energy from the engine to operate various additional equipment. In this blog post, we will delve into the applications, functioning, different varieties, maintenance, and model identification of Power Take Off systems.
Understanding Power Take Off Applications:
PTOs find extensive use in a multitude of industries such as construction, agriculture, manufacturing, and transportation. They provide power to auxiliary equipment, blowers, including hydraulic pumps, generators, winches, and compressors. For instance, in the agricultural sector, PTOs enable the operation of machinery such as balers, mowers, and sprayers, enhancing productivity and efficiency.
How Power Take Off Works:
To comprehend how PTOs work, we must grasp the underlying principles. PTO systems typically consist of a drive gear attached to the engine or transmission, which transmits rotational power. This power is then transferred to an output shaft ( drive shaft), often via a clutch mechanism, where it can be used to drive various external machines. The PTO’s operation is synchronized with the vehicle’s engine speed to ensure the efficient transfer of power.
Varieties of Power Take Off:
PTOs come in various types based on their mounting method, features, and applications. The customer may have a side mount or rear mount depending on their specific vehicle or machinery requirements. Each type offers unique advantages such as easy access, improved versatility, or reduced maintenance needs. By selecting the appropriate PTO, customers can optimize operations and achieve better overall performance.
Power Take Off Maintenance:
To ensure optimal functioning, regular maintenance is crucial. Neglecting PTO maintenance can lead to operational issues, decreased efficiency, and potential breakdowns. Here are a few maintenance tips to keep in mind:
1. Regular Inspection: Routinely inspect the PTO for any signs of wear and tear, leaks, or loose connections. Address any issues promptly to prevent further damage.
2. Cleanliness: Regularly clean the PTO system, removing any debris, dirt, or contaminants that may affect its performance. Ensure that the area around the PTO remains clean to prevent ingress of harmful substances.
3. Proper Installation: Ensure that the PTO is installed correctly, following the manufacturer’s instructions carefully. Improper installation can lead to misalignment, excessive vibrations, and premature wear.
Finding the Model Number:
For customers seeking replacement parts or identifying their PTO model, locating the model number is essential. Here’s a model identification breakdown:
1. Locate the PTO: First, identify the PTO’s physical location on your vehicle or equipment. It may be near the transmission or mounted externally.
2. Look for Identification Plates: PTOs typically have identification plates or labels attached to the housing. These plates contain crucial information, including the model number.
3. Decode the Model Number: The model number comprises alphanumeric codes, often with specific meanings assigned by the manufacturer. Consult the manufacturer’s documentation or website to decipher the code and determine your PTO’s specific details.
OR
You can provide the transmission model number or PTO model number to K&S and we will be happy to assist in finding the correct PTO that works best for your truck and blower.
Conclusion:
Power Take Off systems play a significant role in various industries, bringing forth efficient power transmission to auxiliary equipment. Understanding its applications, working principles, types, and maintenance practices are vital for customers. By following proper maintenance procedures and knowing how to identify the model number, users can ensure the longevity and optimal functioning of their PTO. Remember, a well-maintained PTO translates into enhanced productivity and reliable performance for the equipment it powers.
Got Questions? Let Us Help!
Kerley & Sears Inc. has been a family-owned and operated business since 1971. We specialize in the sales, service, and repair of pneumatic tools and industrial vacuum parts. With over 50 years in the industry, our customers can expect excellent customer service and can trust our expertise and quality work. We offer resale discounts and free estimates depending on the repair. Give us a callor stop by today!
Trailer maintenance is an essential part of ensuring smooth and efficient operations in the transportation industry. A well-maintained trailer not only saves time but also increases profitability on each load. On the other hand, neglecting trailer maintenance can lead to longer unloading times, increased fuel consumption, and potential damage to the trailer and its components. In this blog post, we will discuss the importance of properly maintaining your trailer and highlight some key areas that require regular attention.
1. The Importance of Trailer Maintenance
Proper trailer maintenance is crucial for several reasons. Firstly, a well-maintained trailer ensures faster and safer unloading of products. An improperly maintained trailer can experience leaks or cracks in its valves, aeration system, and check valves, which can slow down the unloading process. This not only wastes time but also puts additional strain on the blower and increases fuel consumption for the truck.
Secondly, maintaining the trailer’s pop-off valve and gauges is equally important. If these components malfunction, there is a risk of over-pressurizing the trailer. Over-pressurization can cause the relief valve to go off, potentially leading to damage to the product line during unloading.
2. Check Gauges
One crucial aspect of trailer maintenance is regularly checking the gauges. Faulty gauges can lead to over-pressurization of the trailer and cause the relief valve to activate. To ensure the gauges are working correctly, visually inspect them for any signs of damage or fluid leakage. Broken needles or leaking gauges should be replaced immediately. Additionally, check the lines connected to the gauges to ensure they are clear of any product buildup that could result in false readings or no pressure reading at all.
3. Check Trailer Relief Valve
The trailer relief valve is responsible for releasing excess pressure to prevent damage to the trailer and its components. It is essential to remove and pressure test the relief valve regularly to ensure it is functioning correctly. If any issues are detected, such as failure to release pressure or excessive pressure release, the relief valve should be replaced promptly.
4. Inspect Check Valves
Check valves play a crucial role in preventing product backflow and maintaining the proper flow direction during unloading. Regular inspection of the check valves is necessary to ensure they are functioning correctly. The lid of the check valve should be removed, and the flapper inspected to ensure it is correctly sealed. If the check valve fails to seal properly, it can lead to clogging of the trailer, causing the product to bypass into the blower. This can result in overheating, damage to the blower, and other components.
5. Inspect Aeration
The aeration system in a trailer helps to maintain product flow during unloading. It is vital to check the aeration system for any leaks, including the manifolds and hoses. Additionally, inspect the hopper savers and the blue cones inside the tank for any signs of damage or wear. Faulty components such as the Solimar disk or hopper savers can allow product and pressure to escape back into the lines, causing clogging and prolonging unloading times.
6. Inspect Pads
If your trailer includes pads, it is essential to regularly check them for obstructions, build-up, and damage. Ensure that the pads are in good condition and free from any debris that could hinder unloading operations. If the trailer has flo cones, inspect them for signs of wear or damage.
7. Check Butterfly Valves
Butterfly valves are critical for controlling the flow of product during unloading. Regularly inspect the butterfly valves to ensure they are opening, closing, and sealing properly. Check for any signs of wear on the rubber seats and the valve disk. Damaged or faulty butterfly valves can cause pressure to escape, forcing the blower to work harder.
Final Thoughts
Maintaining your trailer is essential for efficient and profitable operations in the transportation industry. Regularly checking and inspecting various components, including gauges, relief valves, check valves, aeration systems, pads, and butterfly valves, will help prevent potential issues and ensure a smooth unloading process. By investing time into trailer maintenance, you can save time, reduce fuel consumption, and increase overall efficiency per load.
Pneumatic Blowers: A Guide for Maintenance and Operation
Pneumatic blowers are an essential tool used in many industries, including manufacturing, construction, and transportation. These blowers are responsible for creating and maintaining a steady flow of air, making them crucial for various processes. To ensure their proper functioning, regular maintenance and operation are necessary. In this guide, we will discuss the steps required to maintain and operate pneumatic blowers effectively.
Daily Maintenance
The first step in maintaining a pneumatic blower is to check and maintain the oil level. It is crucial to monitor the oil levels in both the drive end and driven end of the blower and fill them as needed. Different blowers have specific oil requirements, so it is essential to use the recommended type of oil. For the first year, MD oil is recommended, followed by Amsoil. Complete oil changes are recommended every 500 operating hours for stationary units, while truck-mounted blowers should be changed when the truck oil is changed.
Another important aspect of daily maintenance is checking and cleaning the air filter. A clogged air filter can significantly affect the efficiency of the blower and cause overheating. Therefore, it is necessary to clean the air filter as necessary to ensure optimal performance.
Weekly Maintenance
On a weekly basis, it is crucial to clean the air filter if you have not yet within the week. This step helps prevent any build-up of dirt and debris that may have accumulated over time. It is also recommended to check the relief valve to ensure it is operating properly. The relief valve is responsible for regulating pressure within the blower, so it is essential to check its functionality regularly. Additionally, greasing the u-joints on the drive line is necessary to prevent any friction or damage.
Monthly Maintenance
Monthly maintenance involves inspecting the entire system for any leaks and checking the oil level once again. Any leaks can signal potential issues that need to be addressed promptly. It is also important to inspect the condition of the drive line, as any signs of wear or damage should be addressed before further operation.
Semi-Monthly Maintenance
Every two weeks, it is crucial to inspect the drive line u-joints for any wear or damage. These u-joints are vital for the smooth operation of the blower, so any issues should be addressed immediately. Additionally, oil should be changed even if the blower has not reached the recommended 500 operating hours for stationary units and truck blowers.
Oil Capacity
The oil capacity varies depending on the type of blower. For Gardner Denver T9, T12, and T-13 blowers, the oil capacity is 2.75 quarts, and one end is required to be greased.
For MD T850 and T1050 blowers, one quart of oil is required on the drive end and one quart on the driven end. These blowers do not require greasing. However, if the blower is laid horizontally in operating conditions, it will hold 1.5 quarts of oil.
For MD T855 and T1055 blowers, 1.6 quarts of oil are required on the drive end, and 1.75 quarts are required on the driven end. Similar to the previous blowers, greasing is not required.
Summary
Proper maintenance and operation are key to ensuring the longevity and efficiency of pneumatic blowers. Daily checks of leaks and air filters, as well as regular greasing and oil changes, are necessary to prevent any issues and keep the blowers running smoothly. By following the recommended maintenance schedule and understanding the specific requirements of each blower, operators can maximize the performance and lifespan of their pneumatic blowers.
Pneumatic trailers are a type of commercial trailer that are commonly used to transport materials that are dry, granular, and flowable. They are used primarily to transport commodities such as cement, sand, grains, flour, and plastic pellets. If you have ever seen a large commercial vehicle on the road that has a conical shape and a series of connections running along the sides, you have likely seen a pneumatic trailer. In this article, we’ll explain what a pneumatic trailer is and how it works.
What Is a Pneumatic Trailer?
A pneumatic trailer, also known as a dry bulk trailer or tanker, is a specialized commercial trailer that is used for hauling dry, fluidizable materials like grain, fertilizers, and other types of bulk commodities. They come in different sizes and configurations, ranging from smaller tankers to larger tankers that can carry up to 3,000 cubic feet of material.
Pneumatic trailers are composed of a large cylinder that is mounted on a trailer frame. The cylinder has a number of internal compartments that are used to transport various types of materials. The trailer is self-contained and is powered by a compressor that is mounted on the tractor, which supplies pressurized air to move the material out of the trailer’s compartments.
How Does a Pneumatic Trailer Work?
When a pneumatic trailer is being loaded with material, the commodity is fed into the top of the cylinder. The material then enters the individual compartments where it is held until it is ready to be unloaded.
The pneumatic trailer’s compressor will start to generate air pressure, which is used to push the material out of the compartments. The compressor typically generates air pressure between 10 and 20 PSI, which is enough to move most types of materials.
Once the material has left the compartment, it is transferred to a hose that is connected to the side of the pneumatic trailer. The hose is then connected to a storage bin or other container where the material will be stored until it is needed.
Pneumatic trailers can be unloaded in a variety of ways depending on the type of material being transported. For example, some materials like sand or grain can be unloaded by gravity, while others like cement require a powerful blower to remove the material from the trailer.
Advantages of Using a Pneumatic Trailer
There are several advantages to using a pneumatic trailer to transport bulk materials. One of the most significant advantages is their ability to unload quickly. Unlike other types of trailers that require manual unloading, pneumatic trailers can be unloaded automatically, which can save a significant amount of time and reduce labor costs.
Another advantage is that pneumatic trailers are designed to carry a wide range of materials, from lightweight powders to dense aggregates. This versatility makes them an ideal option for hauling multiple types of materials on the same haul.
Pneumatic trailers are also safe and reliable, as they are designed to withstand the rigors of transportation. They are equipped with heavy-duty brakes, suspension systems, and other features that ensure they can handle rough roads and extreme weather conditions.
Conclusion
Pneumatic trailers are a crucial tool in the transportation industry, especially when it comes to transporting materials that are dry, granular, and flowable. Their ability to transport multiple commodities and unload materials quickly and efficiently has made them an integral part of the bulk transportation industry.
If you are in need of transporting dry bulk materials, a pneumatic trailer is an excellent option to consider. By understanding how it works and its advantages, you will be better suited to decide if it is the right option for your specific transportation needs.
Got questions about pneumatic trailers? Let us help! Contact us today to learn more about what we can do for you!


 In the world of transportation and logistics, safety and efficiency are paramount. Kerley & Sears Inc., a trusted name in the industry, has partnered with RMC, one of our reliable vendors, to bring you the RMC Automatic Lids, a game-changer in ensuring safe and efficient operations. In this blog post, we will delve into the installation and maintenance of these cutting-edge lids to help you make the most of this innovative product.
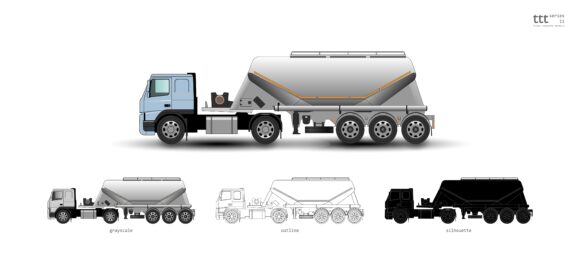 What Is a Pneumatic Trailer and How Does It Work?